 I stitched two samples on calico using a thin and a thick cotton thread.

 These were then coated with gesso.


I layered and rubbed back the first one with acrylic paints hoping to get some sort of aged/distressed look...

...but it didn’t work so out came the Quinacridone Crimson followed by Treasure Gold!

The second one I painted with Koh-i-noor dyes. Red first followed by navy then rubbed over with bleach. The first picture shows the effect almost as soon as I put the bleach on and the second picture is after it had dried out.


What I really got excited about though was this technique. It didn’t really work as a sample but I still liked the effect.
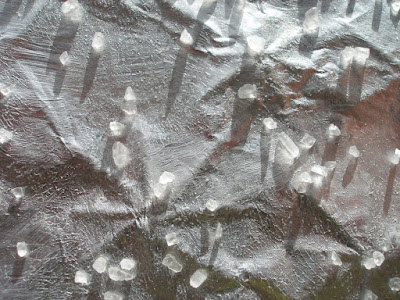
I laid a piece of household tin foil over the calico and thick thread sample and rubbed hard to get an impression in the foil. I painted this over with Gel Medium to hold the impression in place and sprinkled coarse sea salt on. You can just see the outline of the stitches in this photo below.

Phthalo Turquoise paint was mixed with a small amount of Quinacridone Crimson and painted over the foil. This was followed by a coat of Quinacridone Gold.


These photos were taken while the paint was still slightly wet, but the effect is the same even when dry. If you double click on the first two photos above you will see a lovely twinkly starry effect caused by the reaction of the salt with the paint - I think!
Maybe the reason the stitches didn't show up better is because the foil is too thin to hold its shape. Next time I will either glue the foil on top of the stitches or perhaps use a craft foil.
24 comments:
Great experiments again!
I like the blue (turquoise) sample.
I liked the self coloured eyelets but I loved the results of your experiments especially the "starry" ones.
You are so creative! I love those bleached ones, very cool.
Good gracious! This is amazing!
Lynda I would love to get inside your head -I just love the way you think outside the square.
I started off thinking I love the hessian sample(and still do)but as I scrolled down the page I couldn't believe my eyes.
You rock.
Cool experiments! I love the bleached sample. You have taken TAST to a new level of experimentation!
This is really cool - and very inspiring!
these pieces are fantastic !!! way to go !!! love them all !!!
Fun, fun, fun. Cool samples/techniques!
Wow again! Do you plan these things ahead of time or do you just start your experiment and take if from there? These are all so interesting.
I am amazed with how far you went with the TAST stitching. Love the experiments. Thanks for sharing.
ooh what can I say, fantastic,
What wonderful experiments you have there Lynda. You are so inspirational I want to go and have a go this very minute, but I can't as I have to prepare for a dyeing class today.
Each one is a work of art.
what a cool experiment, stunning texture!
thanks for the inspiration
neki desu
WOW! You never cease to amaze me with your wonderful ideas and samples. Thanks for continuing to share and being an inspiration :)
wonderful to see al if these experiments
Thanks for sharing
Lynda you are fabulous with your experiments and sharing of how you made them!! I love them from the very first hessian one, to the last.
Interesting step wise techniques!
I also enjoy just playing without worrying about an end product ... need to do it more!
wow!!! beautiful work, your blog is amazing!!!!
thanks for your visit on my blog.I added your blog on my links.
Thanks for sharing your experiments with us. I am salivating over all of the colors and wish I could feel the textures.
Gorgeous work!!
Have added you to my list of blogs to visit and will visit, and often..
hi
have a gift for you to play with. i'll send you an invite from photobucket and you can use the image in whatever way you like
oh! need your e mail address
neki desu
Neat projects!! It made me wonder if with the foil one you filled the back with modeling plaster and let it dry, then when you flipped it over and did your paint treatment the shape would stay in the foil.
Wow. These experiments are absolutely fantastic. I love them!
Post a Comment