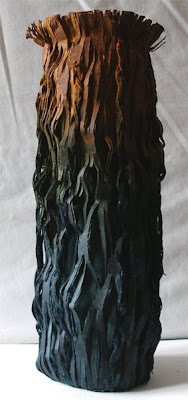
Hankering back after those ‘good old days’, I decided to get the knitting machine out. Took me forever to set it up, then I had to revise on the technique I wanted to use.
I wanted to do some double bed ‘quilting’ and slot in pieces of the glitzy fabrics on polythene I made last week. I used a purple coloured enamelled copper wire with a rayon thread. The wire seems to knit easier on the double bed along with a machine embroidery thread.
And this is what I came up with.
 Yes, exactly what I thought! I had intended to incorporate beads and coiled wires but stopped here. I just don’t seem to be able to do ‘pretty’ at the moment.
But all was not lost. *LOL* I slapped on a patchy coat of Metallic Iron paint, I wanted to still be able to see the glitzy fabrics here and there, and then the Rust Activator. And this is what it looked like an hour into the rusting process.
 It will rust even more than this in the next day or two, so I’ll show it again later. Still not great, but this sort of thing appeals much more - well to me at least:)
The technique I used to knit the vessel was one I used a few years back for this panel.
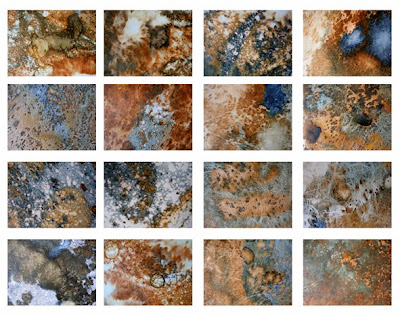
 There are eight panels altogether, two different colour ways, but I can’t lay my hands on the second one at the moment. They were going to be put together to make the base of two vessels both standing about 2 foot high. The insides are space dyed silk velvet, the inspiration for the colours taken from photographs of lava flow. My Mentor in the group I was in at the time made some very disparaging remarks along the lines of knitted wire being done to death, so I never completed them.
And yet I see that the Opus advert for their degree show has a wonderful knitted wire piece in it. Makes you wonder sometimes. :)
This weekend I spent rust dyeing for a swap I am in with the DyeHard Surfacing group. These are the fabrics ‘cooking’ in the sun yesterday. Yes, I do like a glass of wine or three.
 And because the weather has been so hot they were ready to be rinsed out today. I won’t make you brain dead with loads of photos, nothing new anyway, but just wanted to show these.
I seem to get some really good results using cotton velvet and once rinsed through it still comes up really soft.
 The back looks just as good as the front.
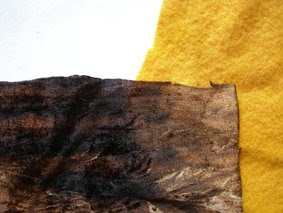
 I also tried this fabric. I think it must be polyester as the soldering iron slices through it really easy. It’s a really soft fabric with a feel of suede about it. I had a blouse some time ago made from Tencel, and this fabric feels very much like it.
These photos show the back and front of two of the pieces.
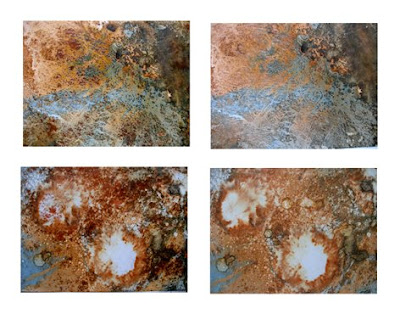
 I thought I would also give some Lutradur a go and see what happened. When I unwrapped them they looked really good so I took some photos just in case – these were taken outside.
The first one is Heavyweight Lutradur and the second is Lightweight Lutradur.

 And this is what they looked like after rinsing through – still pretty good, but next time I won’t bother to rinse them. They will go well with the rusted Tyvek paper.
 While I was at it, although I said I wouldn’t, I decided to do some more Caustic Soda/Ferrous Sulphate dyeing. I didn’t want to waste 50 teabags this time, so I thought I would give the fabrics a quick dip in Potassium Permanganate – but after searching high and low for about an hour I gave up and soaked the fabric in a watery mix of Walnut Ink – and it worked. The fabrics came out a tea stained colour.
I tried a piece of the polyester fabric above and the colours were really gorgeous – unfortunately I didn’t take a photo and of course, once rinsed through it just looks a rusty colour now. I shall try this one again though.
I also coloured some nappy liners, which didn’t need to be rinsed through:
 A couple of the pieces of cotton canvas looked really good too. They both looked pretty similar to this one.
 Close ups.
 But when I rinsed one of them through it then looked like this.
 This fabric really needs rinsing as apart from having a strange odour it’s still very gritty and dusty and even when dry you get rusty fingers. But I wanted to try and keep the colours. I had already tried Polymer Medium and found this had some sort of reaction with the chemicals so thought I would have a go at waxing it.
But of course, I run out of the Beeswax granules from Art Van Go after the first coat so had to resort to another product which says it is Beeswax but it turned everything yellow!
So although it hasn’t turned out quite how I would have liked it’s still a technique worth pursuing.
 Last on the list for the weekend (apart from the Calendar Girls card & the painted quilt for Doreen K – I haven’t forgotten you) are the metallic surfaces I promised myself I would do a couple or so of each week. Hadn’t got time for much so decided to resort to good old brown paper.
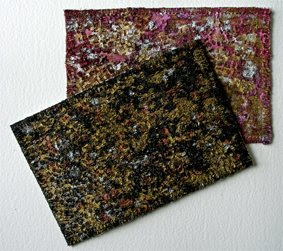
This first one is brown wrapping paper painted with black acrylic paint, metallic wax crayons were grated over the top and then ironed. I had coated my original one with Acrylic Wax but wanted this one to look shiny so gave it a coat of Polymer Medium.
 The brown paper in this one is painted with black drawing ink and metallic wax crayons were also grated over the top and ironed. I rubbed the melted wax while it was still warm to make it spread out. This one hasn’t had a top coat of anything put on.
 Now I must away, there’s a (huge) pile of ironing that’s been calling my name all weekend :)


